Project Guide
DIY Recycling Center
Are you ready to get serious about home recycling? It’s easy when you have a system in place that helps you separate materials. In our Recycling 101 story, we noted that it’s important to prevent material cross-contamination, to keep rinsed soda cans from getting your paper wet. This guide will show you how to build a stacked recycling station with individual containers to help separate different materials.
Tip: The type of containers you use to organize is completely up to you. Whether you opt for plastic storage bins, a storage box, totes, just be sure that their width and depth match the measurements of your tower.
Tools
- Circular Saw
- Clamps
- Power Drill
- Safety Glasses
- Sanding Sponges
- Tape Measure
Materials
- Drywall Screws
- Storage Bins
- Studs
- Wood Stain
1. Step 1: Measure the Wood
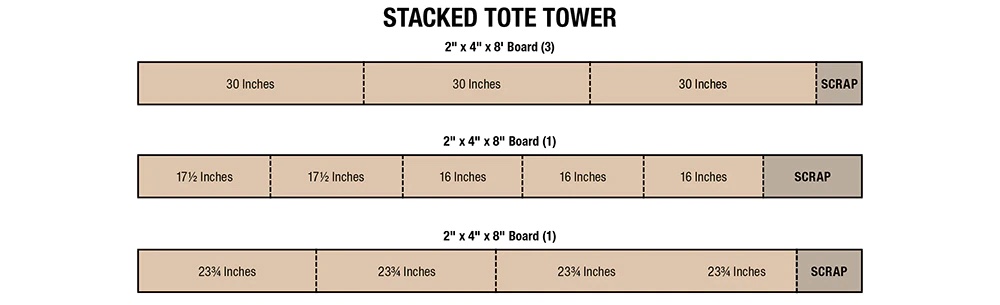
- Using the measuring tape, measure and mark cuts on the 2- x 4-inch x 8-foot studs according to the cut list.
2. Step 2: Cut 2x4s
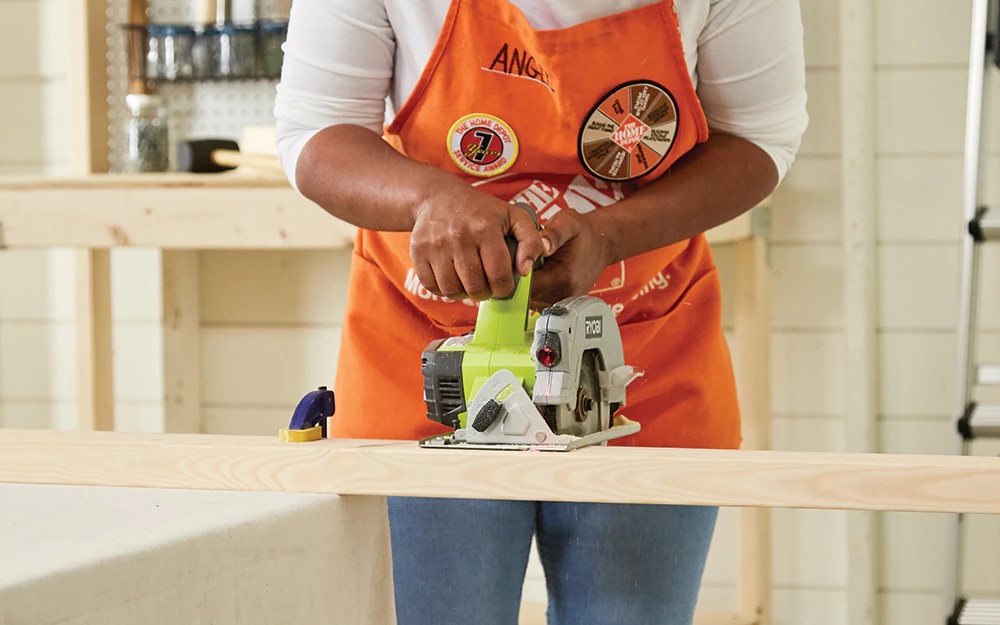
- Use a circular saw to make the straight cuts on the studs.
- Use the sanding block to smooth any rough edges.
3. Step 3: Stain or Paint Boards
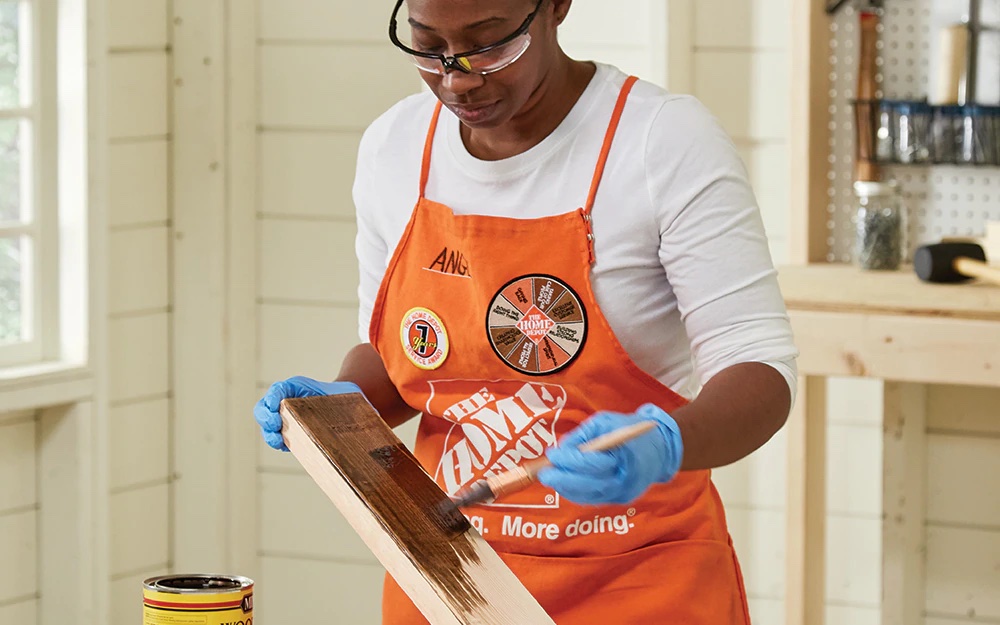
- For a stackable storage tower that blends in with your home decor, stain or paint the wood frame the color of your choice.
- Be sure to stain or paint boards prior to assembly if desired.
4. Step 4: Assemble the Sides
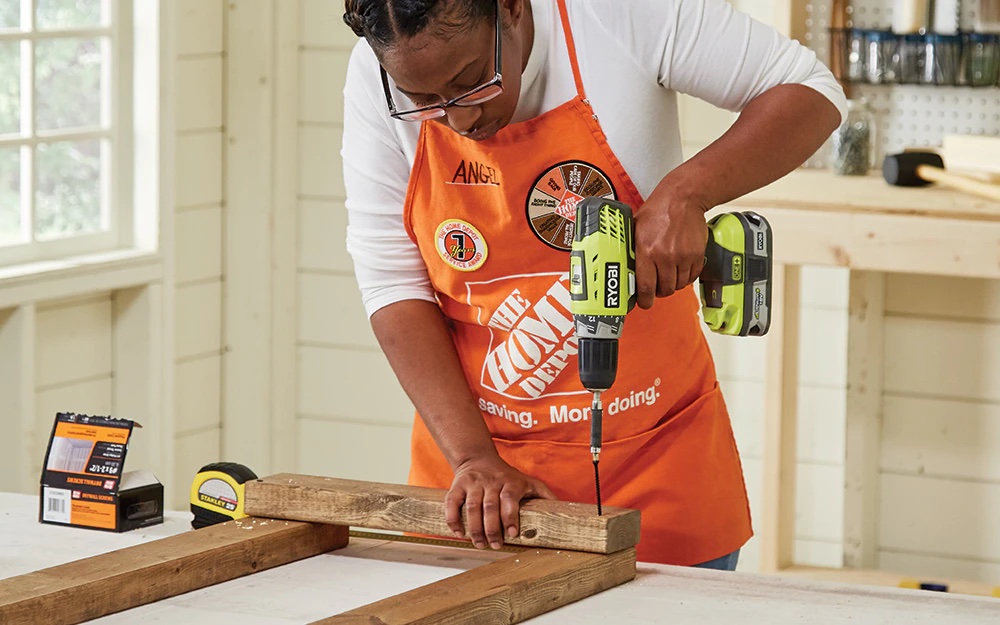
- Lay two 30-inch boards vertically so that they are 17½-inches from outside edge to outside edge. Attach one 17½-inch board across the top of the vertical boards so that it’s flush to the outside and top edges.
- Flip assembly over and place two 16-inch boards across the frame; set one board 10 inches from the bottom and the other 2½-inches down from the top.
5. Step 5: Align the Boards
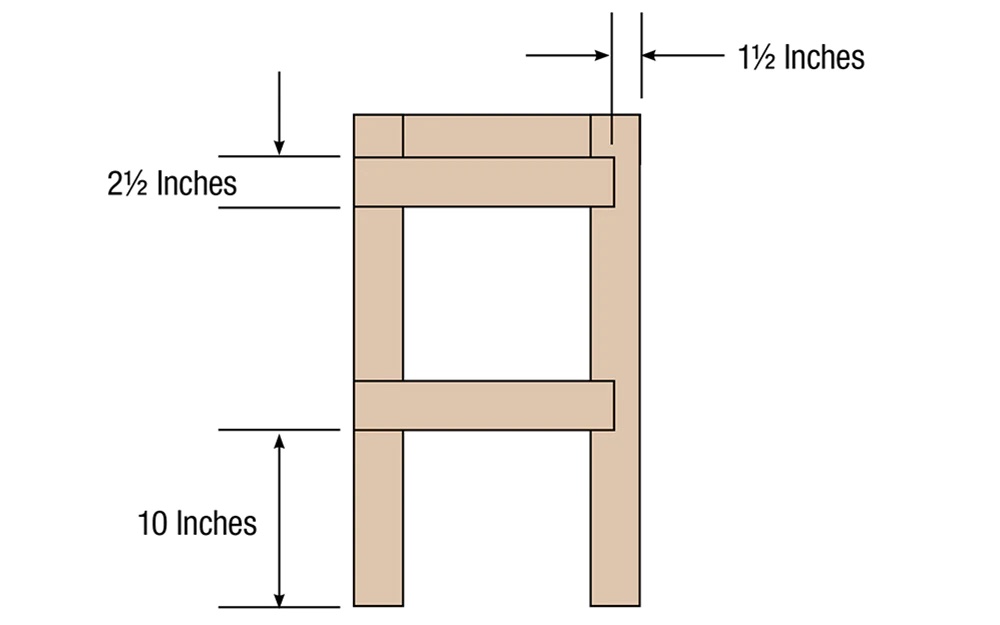
- Align boards so that one side is flush and the other side is offset 1½-inches, as in the diagram above.
- Repeat steps to build a mirror image opposite side.
6. Step 6: Attach the Sides
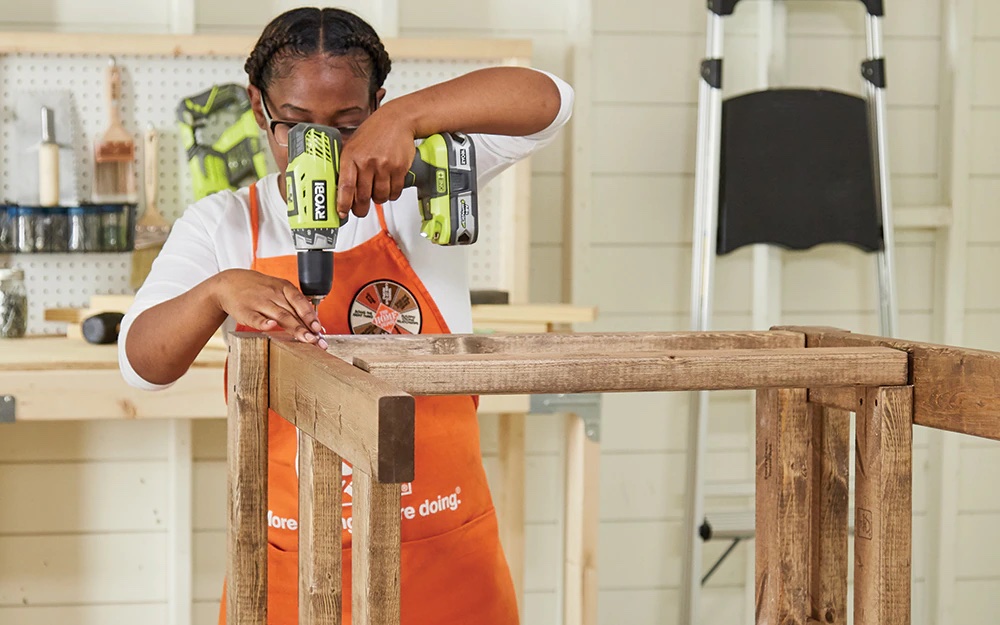
- Place two 23¾-inch boards on end flush with the 16-inch cross boards and secure to each of the sides. These create the stops for the plastic bins.
- Turn the final 23¾-inch board on its side and place between the front legs flush with the bottom of the legs. Secure with screws.
7. Step 7: Create the Top
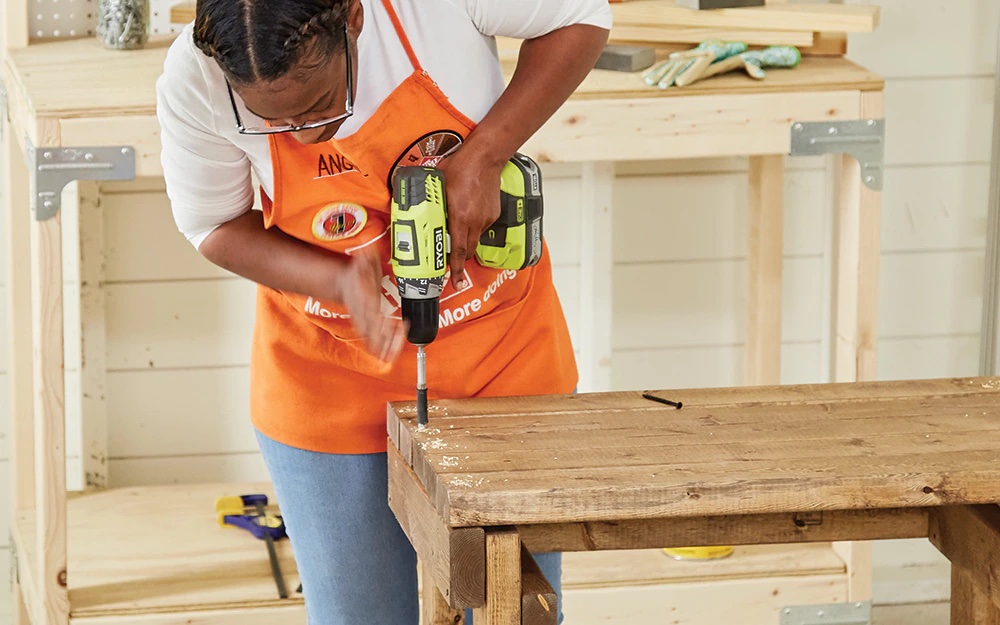
- Place five 30-inch sections across top of assembly and secure with drywall screws.
8. Step 8: Insert Bins and Finish
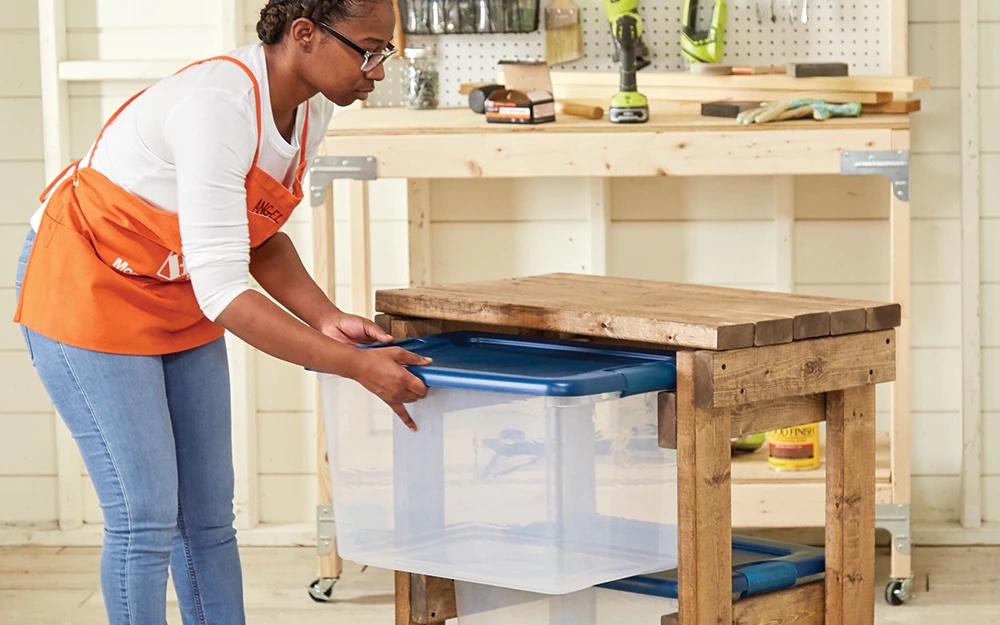
- Insert plastic storage bins into slots.
- Try sliding them in and out to make sure they fit well.
Tip: Depending on how much you need to store, build one or more of these towers and use them side by side for an organized storage unit that gives you easy access to your items.