Project Guide
How to Build a Box Fan Air Purifier
This summer has been a scorcher, and air quality has been majorly affected by wildfires. Due to the many wildfires this year across Canada and parts of the US, many people learned firsthand that wildfires can drastically reduce air quality, even in places far away from the fire. Heat waves often mean poorer air quality in general, with stagnant air keeping pollution from dissipating. Here at Eco Actions, we know clean air is foundational to the health of the planet and our customers. If you’re looking for an easy way to keep yourself and your loved ones safe, keep reading – we’ve got just the solution.
If you’re affected by wildfire smoke or poor local air quality, you can buy an air purifier, and we offer many for your consideration. But if you’re unable to afford one or need filtration in a pinch, you can make your own do-it-yourself (DIY) version. While they aren’t as quiet and draw a bit more power than a retail air purifier, the CDC has found that DIY air purifiers are effective at improving indoor air quality in a pinch. Here, we’ll show you how to create your own air purifier in three easy steps.
What You’ll Need
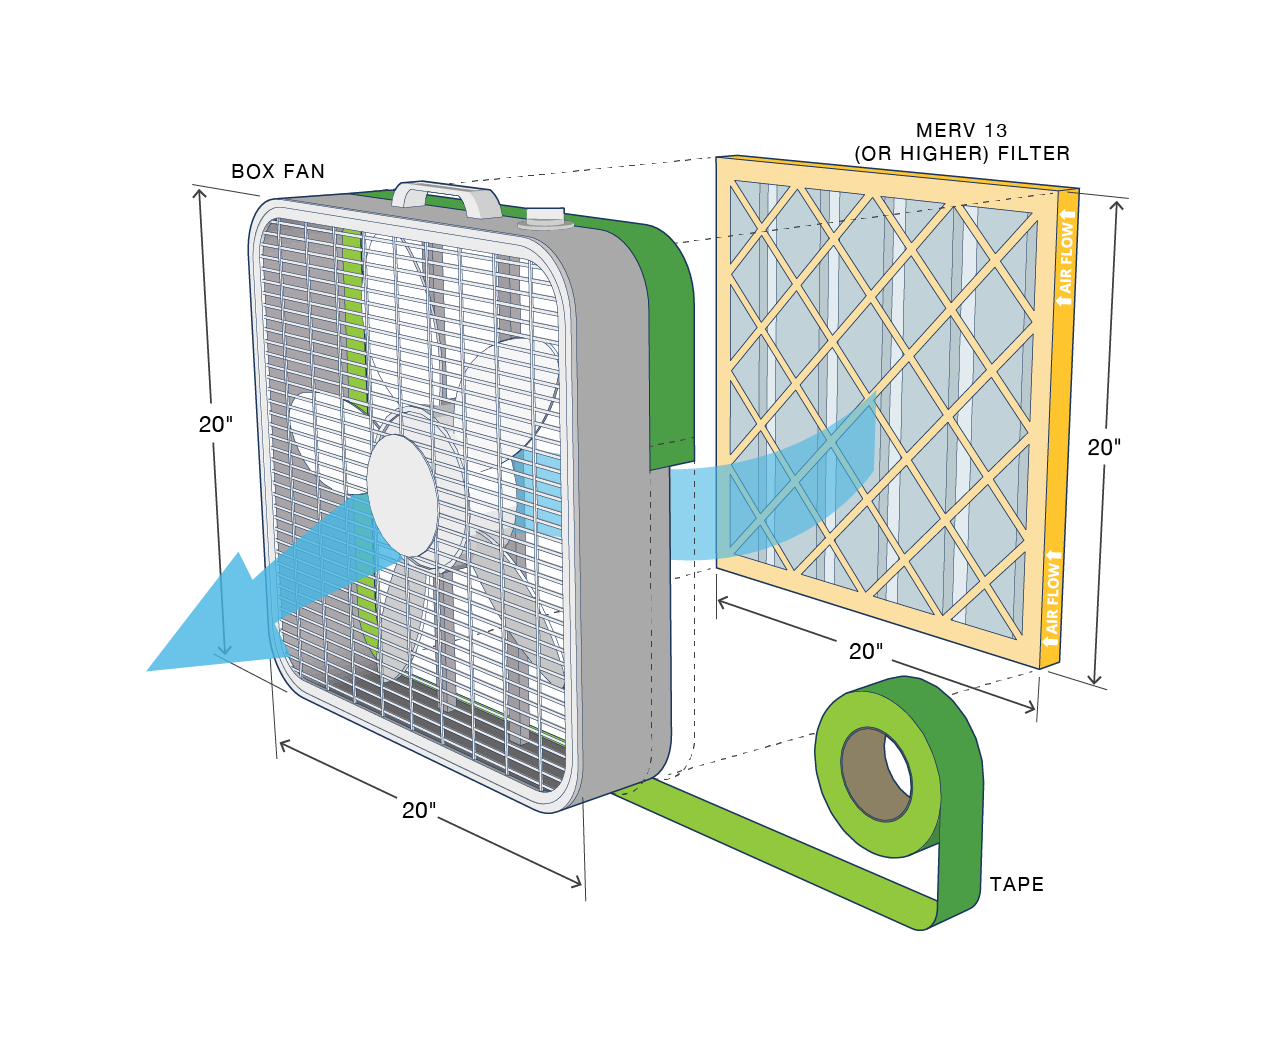
- A box fan measuring 20’’ by 20’’. Note: A box fan that is designed without a power cord and/or a switch/dial on the back (air intake side) of the fan is recommended to achieve a better seal between the box fan and filter.
- A MERV 13 (or higher) air filter, also 20’’ by 20’’. We recommend buying more than one since you’ll need to replace them frequently.
- Tape. Duct tape or masking tape are preferable.
How to Build Your Box Fan Air Purifier
Step 1: Locate the front of the box fan.
Identify which side of the fan is the front (the side that blows the air out), and which side of the fan is the back (the side that sucks the air in). Typically, the fan brand name or logo is located on the front of the fan.
Step 2: Locate the front of the filter.
Identify which side of the filter is the front (the side that pulls the air through). There is typically an arrow on the side of the filter that indicates the direction of airflow. Place the front of the filter against the back of the fan.
Step 3: Attach the filter to the box fan with tape.
Once the box fan and filter are correctly positioned (the front of the filter is placed squarely against the back of the fan), use tape to attach them together on all four sides. Apply enough tape so that the filter is securely attached to the fan, and the seam is continuous with no gaps. Clamps, bungee cords or string may also be used in the absence of tape. Sealants and wet glues are not recommended, as they may be an additional source of volatile organic compounds (VOCs) and may also complicate filter replacement.
When Using These Air Purifiers, it’s Important to Keep These Rules in Mind
- Operate in a clear, open space.
Make sure the fan has open space around it with good air movement to get the most benefits. - Keep the fan and motor clean.
Do not use the fan if there are any signs of damage and keep the motor clean and well-maintained. - Replace the filter periodically.
Keep extra MERV 13 filters on hand. Change the filter every three months at a minimum and more frequently during heavy air pollution events. The more the DIY air purifier operates, the cleaner the air within the room will be if the filters are replaced frequently. - Use a box fan that meets market safety standards for electric fans.
The fan model should meet the UL 507 standard or better and be manufactured in or after 2012.
DIY air purifiers are economical and simple to assemble and require only three parts, which are easy to find in any Home Depot store. They can help keep you safe from harmful air pollution and let you enjoy cleaner, safer air in a more economical way. With your Eco Actions, you can help keep our air a little cleaner, one DIY purifier at a time.
Courtesy Chemical Insights Research Institute of UL Research Institutes