
If you have your own garden, you want it to flourish. Compost naturally breaks down yard waste and kitchen scraps into crumbly, nutrient-rich soil. It’s the best way to add nutrients to your garden and boost any plant. Plus, it’s free.
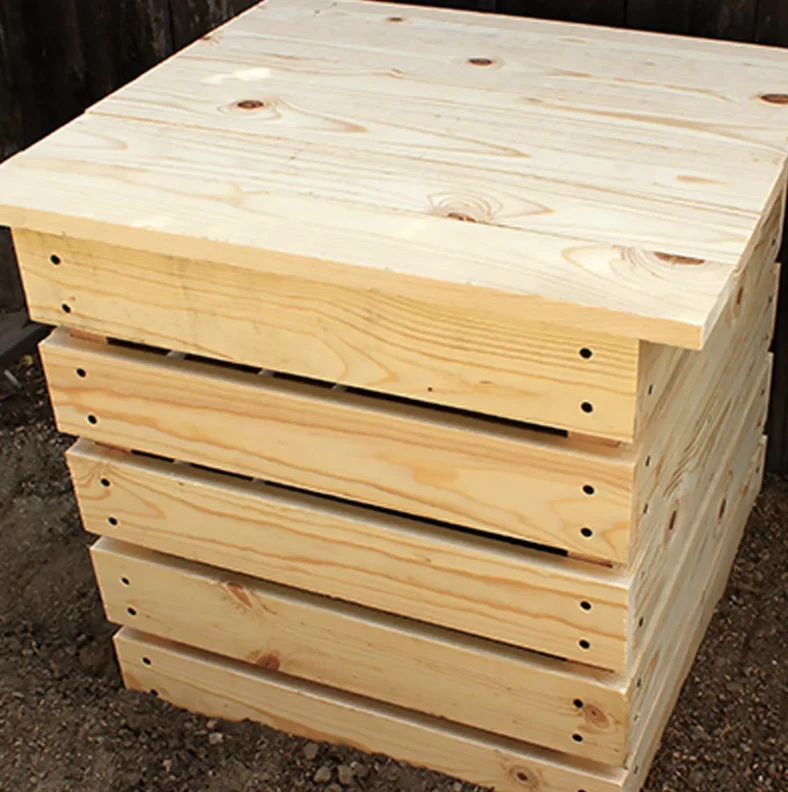
Regardless of the size of your yard, you can make a compost bin to suit your needs. Choose cedar or redwood as these woods won’t rot over time. Store-bought bins are great options, but it can be less costly if you make you own.
Cut the Wood

- Twenty 1 x 4 x 20-inch boards
- Six 1 x 4 x 23-1/2-inch boards
- Two 1 x 4 x 18-inch boards
- Four 2 x 2 x 20-1/2-inch boards
Remember: Measure twice, cut once.
Build the Sides

Take two 2 x 2 x 20-1/2-inch pieces and lay them 17 inches apart from each other. Lay five 1 x 4 x 20-inch boards on top of them spaced 3/4-inch apart. The 3/4-inch gaps allow the bin to get proper circulation. Use a 3/4-inch board to help with spacing. Drill pilot holes on each end of the 1 x 4s and into the two 2 x 2s. Secure the 1 x 4s to 2 x 2s with 10 1-1/4-inch stainless steel screws. Repeat step to create opposite side of bin.
Build All Four Sides

Place the two sides you built in an upright position spaced 17 inches apart with cross boards facing outwardly. Line one 1 x 4 x 20-inch board flush with the top 1 x 4 side pieces. Clamp in place. Drill a pilot hole on each end of the 1 x 4 x 20-inch board and secure with screws to the 2 x 2-inch pieces. Remove the clamps and drill one more pilot hole on each end and secure with screws. Secure four more 1 x 4 x 20-inch boards spaced 3/4-inch apart going down the side. This will give you a third side. Repeat on the other side to create a box.
Build the Lid

Lay six 1 x 4 x 23-1/2-inch pieces side-by-side with no gaps. Place two 1 x 4 x 18-inch boards across these boards, each 4 inches from the edge of opposite sides. Drill a pilot hole through the layer of boards and secure them in place with screws.
Move Bin into Place

Put the bin in a place close enough that you will use it, even in winter. Place it on top of bare earth to allow worms and other beneficial organisms to help aerate the compost. A sunny spot is ideal but not necessary.
Fill Compost Bin

Your compost bin is ready. Add yard clippings, paper waste and kitchen leftovers year-round. Alternate compost materials with moist and dry layers, add compost starter and keep moist. Turn every few weeks using a pitchfork or shovel to help with aeration.


